Quick Look at Iron-On Vinyl
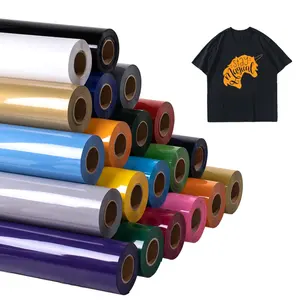
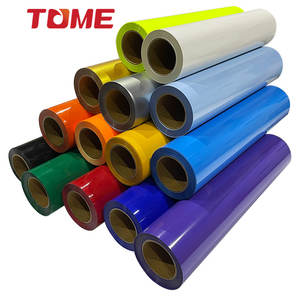
Put simply, iron-on vinyl, aka heat transfer vinyl (HTV), is a special heat-sensitive material that is capable of adhering to different fabrics, from T-shirts to bags to shoes, wood, metal, and paper in order to adorn them. This type of vinyl usually comes in packs, rolls, or sheets and is available as permanent and removable options. As a rule of thumb, HTV vinyl has two layers: the colorful one that comes in the form of a dull side and a plastic carrier sheet that represents a shiny sheen. By all means, one of the most popular alternatives for embellishing clothes now is using Cricut iron-on vinyl, which can outlast 50+ washes and goes in diverse colors from apple green to petal.
Array of Iron-On Vinyl Types to Choose from
Among some printable iron-on vinyl types with rave reviews, you’ll encounter foil iron-on that has a shiny reflective finish and is mostly available in metallic colors. Then goes Cricut glitter iron-on, which, as the name suggests, has a shimmery glittery effect in a variety of rainbow colors. The next type is Cricut smart iron-on which has a matte finish and is cut without a mat. Finally, there’s also patterned iron-on which can transfer vinyl in the form of varied patterns and shapes.
Process of Applying Iron-On Vinyl to T-Shirts
First things first, create one of your iron-on shirt decals of the necessary size and scale it appropriately. Then, mirror the design horizontally to further cut it on the adhesive side so that a plastic carrier sheet on the other side could keep everything in place. After that, put your Cricut heat transfer vinyl sketch side down on a mat sized 12 x 12 inches or 12 x 24 inches, adjust necessary cut settings, and load the cutting mat with the vinyl side down into the machine. Next, accomplish the design cut and weed out excess vinyl that accumulated around the decal so as not to transfer it to the final product. At last, put the sketch onto a T-shirt, cover it with a thin cotton fabric to eliminate overheating, and iron each part of the pattern for about 15-20 seconds. Wait 24 hours for the adhesive to cure, and your T-shirt is ready for wear!


 浙公网安备 33010002000092号
 浙B2-20120091-4